August 31, 2012

Pizza Crust Breadsticks!

Hey Peoples!

I usually only go grocery shopping every 2 weeks, we are at the end of the 2 weeks, and I need to go grocery shopping! As you might expect, I am trying to use up all the food I have left in the refrigerator. I hate throwing food out, so I came up with a couple of recipes that did justice to the leftovers in my fridge.

The first recipe I want to share is pretty simple. I had a partially baked pizza crust sitting in my freezer awaiting any toppings I wanted to put on it. The only problem was...we didn't feel like eating pizza!

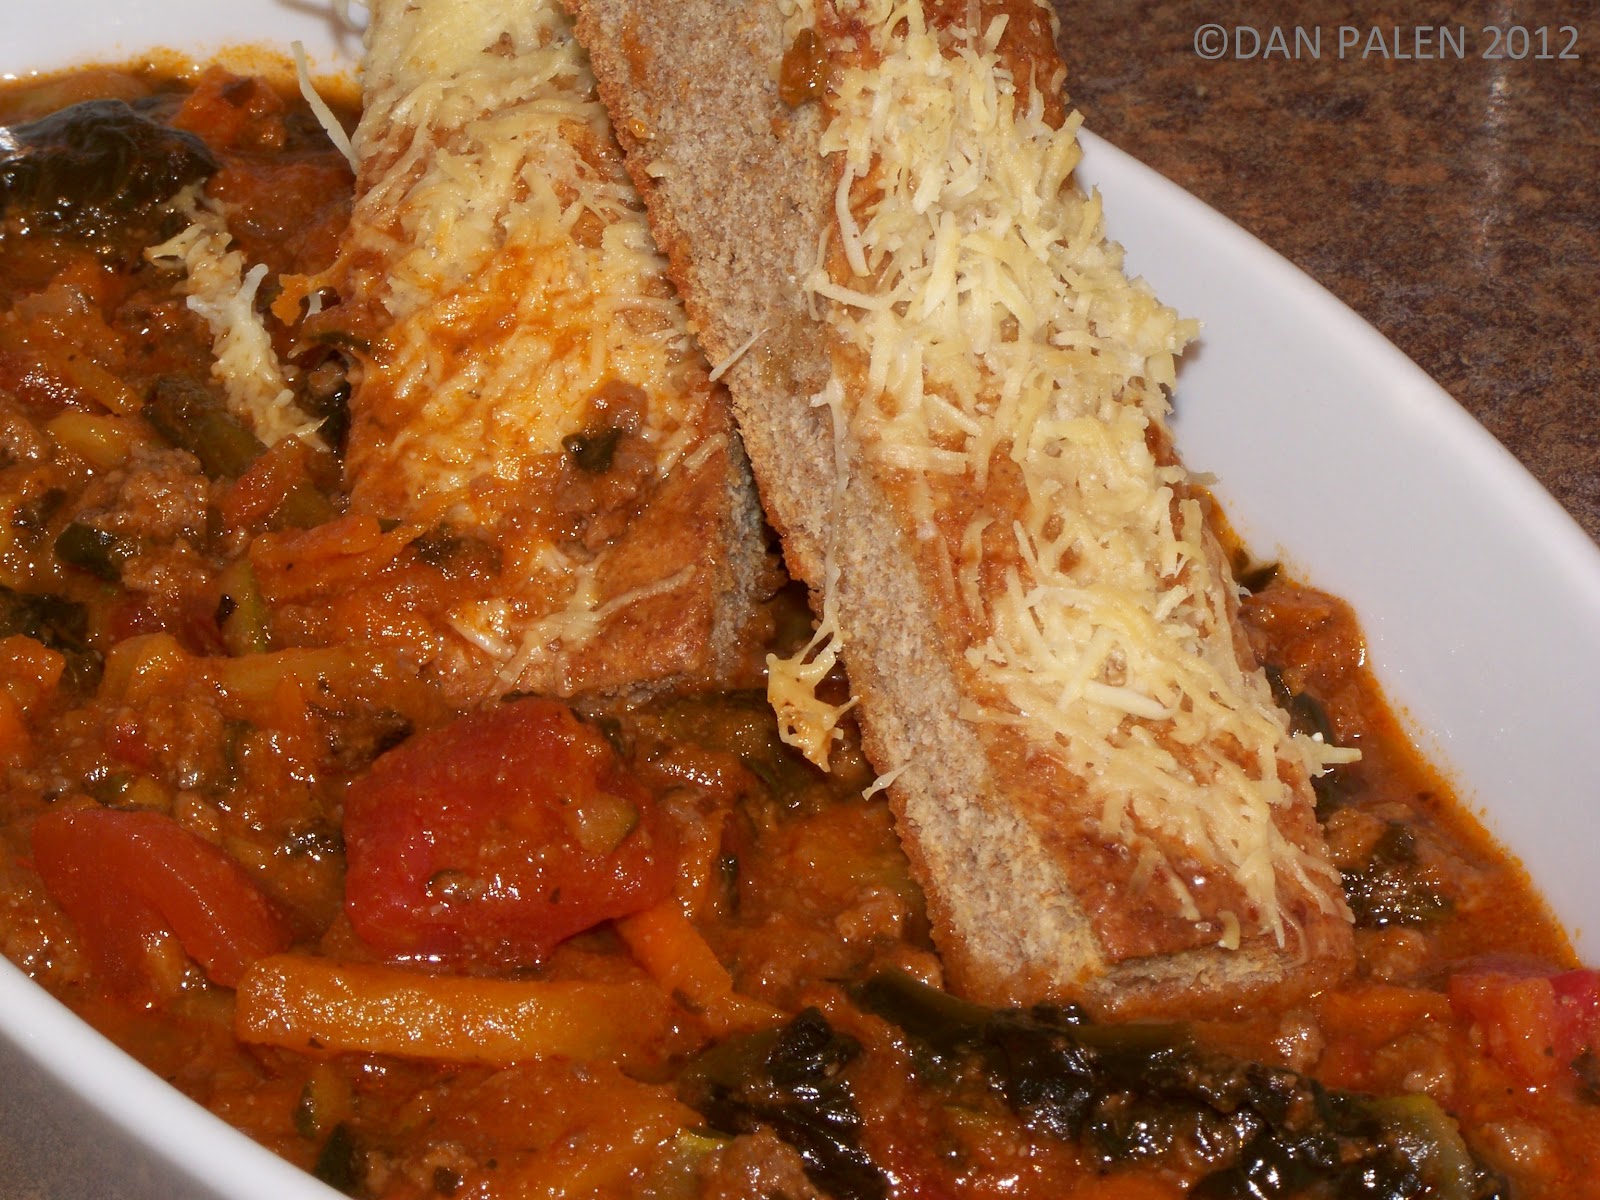
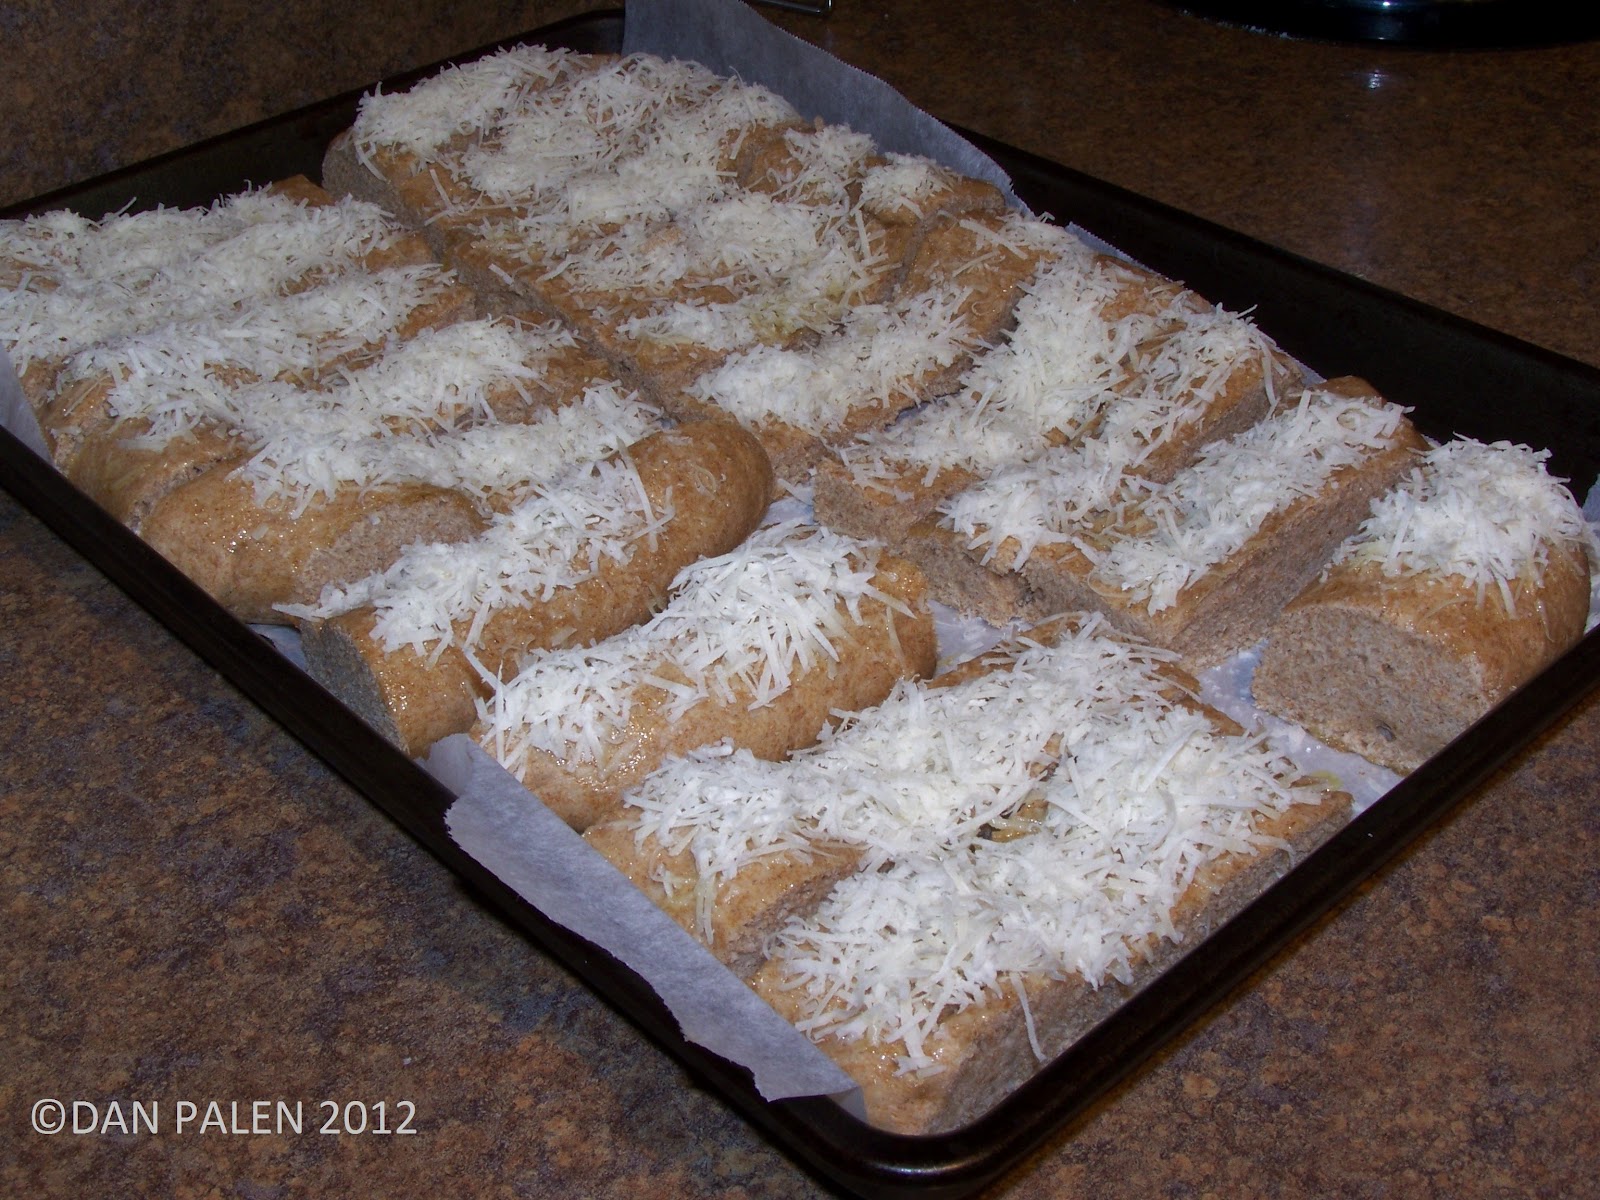
So here's what I did, I made a deconstructed version of Hawaiian pizza (my honey's favorite)! The first part of the deconstruction was to make bread sticks out of the pizza crust. I just cut up the crust into appropriate sized pieces, topped with Pecorino Romano cheese, and then baked like the regular pizza crust would have been.
 The resulting bread sticks were crunchy on the outside, pizza doughy on the inside, and a salty tang from the cheese...in a word: amazing!

The next part of the deconstructed pizza is yummy Hawaiian BBQ chili! But you will have to wait until Monday for that recipe!

All right, here is the recipe for the bread sticks:

Ingredients:
  • 1 recipe for soaked pizza crust, partially baked for freezer storage (6 minutes at 450 degrees), I used my mother-in-law's recipe and tweaked it for soaking purposes.
  • extra virgin olive oil
  • 1/2 - 1 cup of Pecorino Romano cheese, finely grated ( you could also used Parmesan)
  • sea salt
Method:
  1.  Thaw pizza crust at room temperature.
  2. Pre-heat oven to 425 degrees.
  3. Slice the pizza crust into bread stick sized pieces.
  4. Line a baking sheet with parchment paper and place the bread sticks on the pan with space in between each one.
  5. With a pastry brush, lightly brush each bread stick with the olive oil, sprinkle with the sea salt, and cover the tops with the cheese.
  6. Bake for 15 minutes or until the cheese is crispy.
  7. Serve with the Hawaiian pizza chili!

Until next time!...

August 30, 2012

Simple Pan-Cooked Chicken Thighs!

Hey Everyone!

So today, I was looking for something easy and all-purpose to make for me and my honey's lunches. I turned to a tried and true recipe for simple pan cooked chicken thighs.

3 ingredients and an easy cooking method, what more could you ask for! You can use these lovely pieces of chicken for a lot of different delicious lunch ideas. Today I sliced them and put them in California chicken wraps for the hubby's lunch, and mixed them with homemade guacamole/salsa and put them in lettuce leaf tacos for my lunch =] you could also slice them up over a salad or even serve them with some steamed/sauteed vegetables for a healthy dinner!

Easy and delicious, for two or a crowd, I highly recommend you try this yummy all-purpose chicken!

This recipe is appropriate for: paleo, primal, gluten-free, and GAPS diets

Serves 2 healthy appetites!
Ingredients:
  • 4-5 boneless, skinless chicken thighs (organic!)
  • sea salt and freshly ground black pepper
Method:
  1. Pre-heat a heavy bottomed pan (cast iron or stainless steel) over medium-high heat.
  2. When pan is hot, lay the chicken thighs in the pan so they are evenly spaced and not touching.
  3. Do not move them for at least 5 minutes! This is important for browning the meat. In the meantime, sprinkle with salt and pepper.
  4. Take tongs or a spatula and try to pry up one of the thighs, if it releases easily, the meat is ready to flip; if not, give them another minute and then try again.
  5. After flipping the chicken, season the other side. Once again, do not move the chicken for at least 5 minutes, or until the meat lets go of the pan.
  6. When both sides are nice and brown, turn the heat to medium-low and cook each side for another 5 minutes or until the fat is well rendered and crispiness is achieved!
  7. I usually check if the meat is done by cutting into the thickest part and seeing if there is any pink color left, if not, the chicken is ready!
  8. Let the meat rest for about 5 minutes and then serve however you prefer, enjoy!
Until next time!...

August 29, 2012

Hey there peeps!

So, I'm sure you have all been aware of hurricane Isaac battering the shores of the various gulf coasts. Well, suffice it to say that the hubby and I had to make some emergency preparations in case of power, water, and general utility outages. We stocked up on water and packed the important papers and sentimental junk in water tight boxes. But what I didn't realize is when you have committed yourself to a way of eating that does not include any canned food, boxed food, or packaged food that lasts on the shelf for months on end (you know the stuff I'm talking about!), it is incredibly tricky to figure out what to make that won't go bad for at least a few days.

In the end, I bought some packaged trail mixes without preservatives, beef jerky, made nut bars and a ton of granola!

I was recently inspired by a recipe called "skillet granola" (http://amoderngal.com/2012/08/14/skillet-coconut-granola/). Although I have made my own granola before, the method of cooking the grain was what caught my attention. The original recipe makes use of a cast iron pan on the stove top to toast the oats. It is much quicker than the oven cooked recipe I had been using; 10 minutes compared to at least an hour of cooking time! Basically what I did was to use my own granola recipe cooked by the cast iron skillet method.


The recipe is gluten-free and serves 2 people with leftovers...however, in light of preparing for the hurricane, I actually made the recipe about 3 times in a row and stored it in an airtight container!

Here it is:

Serving size: 1 cup

Ingredients:
  • 2 cups of gluten-free oats (such as Bob's Red Mill)
  • 1/2 cup of your choice of roasted or raw nuts (if roasted, do not add to mixture until the end)
  • 1/4 cup of raisins
  • 1/4 cup chocolate chips
  • 2 tbsp honey
  • 2 tbsp coconut oil/butter/olive oil
  • 1/8 tsp of salt
Method:
  1.  Preheat a medium size cast iron skillet over low-medium heat.
  2. When the pan is hot, add the coconut oil, melt, and coat the pan.
  3. Add the oats, salt, and the honey and mix with a spoon until everything is incorporated and coated with the coconut oil.
  4. Cook the mixture for about 10 minutes, stirring frequently. Cook until the granola is a light shade of golden. I ended up removing it from the pan before I really thought it was done, but it crisped up beautifully once I allowed it to cool for a few minutes.
  5. Serve with warm or cold raw milk, almond milk, or coconut milk, or eat like trail mix!
 Until next time...Enjoy!

August 28, 2012

Hello Everyone!

This is my first post on my new blog and I am so excited!

Just to tell you a little more about myself: I love cooking! Almost everything I do in my daily routine revolves around food in some way. If you knew just how much, you would think it was a little sad :) I also like to read, watch movies, and go places with my honey <3

Anyways, I'm starting this blog because I want to start sharing my recipes and food ideas with the world. I am also working on a cookbook that goes into a more detailed explanation of my food philosophy.

Thank you for visiting my blog and I hope you stick around to see some of the amazing things that are going to happen!

Love,
Lindsey